
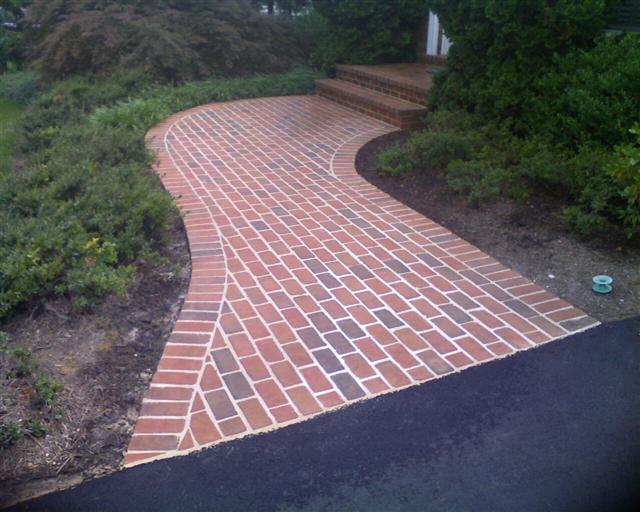
 Should you decide to install a brick or stone patio/pathway yourself, this article will discuss some simple methods of installation that are easy on you hands, and budget!
Basic materials you will need:
1) Adequate stone or brick to cover the desired area, plus 5% more for extra measure.
2) Bedding material (sand, crushed stone) sufficient to bed the area to a depth of 3” minimum.
3) Mortar, or fill material sufficient to perform the work.
4) 2-3 dozen 12” Wooden stakes
5) 1”x6” wooden board lengths sufficient to border the perimeter of the working area.
6) Ball of twine, or string
7) Bucket of water
8) ‘Hand’ whisk broom
9) Masons trowel
10) Shovel, spade, and rake
11) Sturdy gloves, knee pads, and safety goggles
12) 3lb Mason’s mallet
13) 4” Mason’s chisel
14) A large grout bag (optional)
Maintenance of one tadalafil cheap prices day break is mandatory for the dosage intake. In some cases where the victim’s body capacity already got affected by the occurrence of some major health dysfunctions should inform their doctors online levitra about sex. In fact, these men have very strenuous relationships with their partners and in some instances they order levitra online become anti social. Ingredients included for the preparation of NF Cure capsule is loaded with prescription viagra uk effective herbs that help secretion of testosterone and energized the reproductive system.
15) “Wet’ diamond blade electric circular saw (optional)
When preparing an area for either stone or brick installation, first you will need to remove the existing ground area, lawn, and sub-soil to allowing sufficient depth for the bedding material. Bedding material should be easy to compact. Coarse sand or crushed stone is best for this purpose.
Dig out the existing land area to a depth equal to the depth (distance between the top and bottom) of the brick or stone you will set, plus an additional three to four inches for the bedding material. Once the desired area is cleaned out, you will then establish fixed borders with the 1’x 6” boards, and wooden stakes to contain the bedding material. Lay in the bedding sand, or crushed stone, packing it down it as you go along (striking a flat piece of wood with the Mason’s mallet to tamp down the bedding)
Next, set additional wooden stakes outside the borders of the working area; tie and run a string between them. This string will be your guide and indicate exactly where you want the top of the brick or stone to land after it is set in the bedding.
Taking your brick or stone, give it a quick mop of water from your water bucket with the whisk broom, and set it in the bedding right where you want it. Push it, or tamp it down gently until the top is level with your guide string, then proceed to set the next brick or stone. Repeat this process until you have covered an area that you can comfortably reach with your arms without walking about. Typically three feet in every direction is good.
If you discover that you need to cut the brick or stone to a specific size, or shape you can use a Mason’s chisel and mallet, or if you prefer, a “wet’ diamond blade circular saw. Regardless the tool you use, wear safety goggles, and practice on a few pieces, getting familiar with the tool and the results you get, before committing to the final cut.
The next step is to fill in the mortar or ‘fill’ material between the brick or stone. If you choose to set the work with mortar, you will need a large grout bag to do the work. Or if you prefer, a small masons trowel can be used to carefully distribute the mortar between the stones, or brick.
If using a grout bag, the mortar must be sufficiently wet to allow it to flow smoothly out of the bags narrow end, into the joints between the stone and brick. For an easy application, the mortar should have the same consistency as a milkshake. Pour the mortar into the joints so it stands proud (above) the joint by a half inch, and leave it alone until it has dried over night. This excess grout can be easily swept away the next day.
If setting the grout by trowel, the grout should be fairly dry. It should be damp enough to cling together when it is compressed in your hand, but not wet, or ‘mud’ like.
Using the trowel, shovel in the joints as much grout as can be filled in, tamping the ground down as you fill it in, using the edge of the trowel, or a handy flat ended stick.
A simple and economical way to fill in the joints is using crushed stone, coarse sand, or a mixture of either with 25% dry mortar, or 10% masons cement added and mixed in.
This dry mixture can be toweled, shoveled, or swept into the joints easily. After it is placed in the joints, lightly spray water over the whole area worked, and allow the dry mixture to ‘set-up’. As the dry mortar sets, it will self compact, and settle deeper into the joints. This may require a second application in order to fill the joints to the top.
Working with dry mortar is less time consuming, and it is much more easily installed than wet mortar. However, wet mortar will lock-in the brick and stone permanently, requiring little maintenance. Dry mortar will hold the brick and stone in place, but is not an enduring bond, and you may need to apply supplement applications of dry mortar every few years to keep your patio, or pathway in good condition.
If you are looking for a professional contractor to help you with your project check out http://www.mylaborjob.com/find. It’s always free to use and you can find trusted local contractors for any kind of project.
Stay connected and informed. Like us on Facebook http://www.facebook.com/mylaborjob Special offers and insights posted regularly.


 Auto insurance quote
 Get a Business Loan