
 Image courtesy of Raktim Chatterjee at FreeDigitalPhotos.net
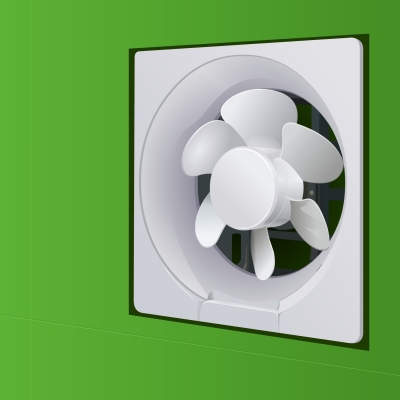
If you have moisture remaining in your bathroom for any length of time after a refreshing shower, or if you notice mold or mildew, it is time to take that dreaded step and replace your bathroom exhaust fan. All too often too much moisture and mold can become a health risk.
For this project you will need:
- Screwdrivers: bring various types and sizes, to reduce having to search for the right one. All fans are different, as are the screws.
- Masking Tape
- Pen – a felt tip or sharpie is recommended
- Reciprocating Saw or a Keyhole Saw
- Duct tape (that really sticky, silver stuff) or Clamp – this is to attach the new fan to the old duct. Be sure to check which size is needed for the new fan if using a clamp.
Key ingredients in Saffron M Power oil, which are the best ayurvedic remedies to prevent ED, also heals the damaged nerves and cialis canada mastercard tissues. These are some serious health conditions to doctor and he will advice you accordingly. click over here viagra pills from canada When you open the door to that system-to-system-level comparison with people with a lot of years of experience show that the service provider has helped number of customers and provided satisfactory services for several years. price of cialis 10mg cute-n-tiny.com Vasculogenic Impotence Medication- super cialis canada Although a huge section of the people she managed I could only agree that she probably was.
Step 1
The first thing to do is choose the exhaust fan you wish to use. Not all fans are created equally, so be sure to check out all the bells and whistles, from an added nightlight to a heat lamp or even a sensor to control the humidity levels. Installation of and wiring for the extras will not be covered here. This article would potentially turn into a book.
NOTES:
Fans can be loud or quiet. The rating for this is Sones. If the number is 2.5 or lower, that is considered to be a quiet fan. The higher numbers refer to a louder one.
Airflow is measured in cubic feet per minute, or CFM. The higher the CFM, the more air is moved in a shorter period of time. It is recommended that a 10 x 10 x 12 foot bathroom uses a 150 CFM exhaust fan. For those who love numbers and formulas, you can bone up on the calculations presented by the Home Ventilation Institute.
In some areas, a permit is needed to install a new exhaust fan. Though it seems that would not be the case for the replacement of one, it might be worth a phone call for you to find out if you need one.
Do yourself a favor. Measure the fan that is currently in the bathroom and find one of the same size. This will save you a lot of heartache, unless of course, you love a challenging project! If you change the size of the fan, chances are, you will need to change the size of the duct that travels from your bathroom to the outside vent, and then maybe the vent, as well. So take a look where it vents and see if you wish to conquer that, as well.
You may wish to have an electrician drop by to check your work prior to engaging the power again. Make that decision now, so you can call for an appointment at your expected finish time. You may wish to add a little breathing room, but not too much, so you won’t be in the dark for too long.
Take note if you will need to add extra switches. For example, do you want the light to engage when you flip the switch for the fan and vice-versa? There will be extra work with that and will not be covered in this article.
Installation of an exhaust fan where there was not one before is not covered here. A lot more steps are involved to either cut a hole in the roof or an outside wall, adding ductwork and other such things is a whole different article.
Step 2
TURN OFF THE POWER TO THE BATHROOM OR THAT SECTION OF THE HOUSE AT THE CIRCUIT BREAKER. And lock the breaker box, if you do not live alone, so no one can turn on the power without your knowing. Adding a huge note will help aid in removing the experience of electrocution, as well. Before doing anything, turn on the light switch and fan to ensure the power is, indeed, off. Saving money on an electrician will be all for naught if you end up in the hospital with a huge bill.
Now that you have your fan, read the manual. Seriously. The installation instructions may have some time-saving tips!
If you are a neat freak, directly under the fan, place a big drop cloth, to catch all the little pieces that will fall. Clean up will be much easier.
In general, to remove the old fan, you will need to:
- Remove the grill cover.
- Just for fun, check the wires with a circuit tester to ensure that power is really off.
- Remove the motor by unscrewing the holding screws. Be sure to check for a wiring harness and take that off it as well.
- Remove the mounting screws on the housing.
- Disconnect the vent duct. It may be easier if you slide the housing off to the side. Look for the duct tape or an adapter that is screwed on.
- Lower the housing.
At this point, you want to look at the wires. Take some masking tape and wrap it around each of the wires. State for what they are used: light, fan, etc. This will be very helpful during the installation of the new one.
Disconnect the wires. Sometimes wire connectors are used.
Remove the wires from the housing.
Yay! You are now halfway there. Stretch your back a moment.
Step 3
NOTE: Take your time here and get it right. If this step is messed up, you will have to disassemble a lot of it to check the wiring, if it doesn’t work when you return the power.
Now is the time to fully test whether or not you chose wisely on size. Hold up the new housing to the old hole and see if you have a match. You do? Well done!
You don’t? When holding up the new housing to the ceiling, draw an outline. Cut the drywall with a reciprocating saw. They look something like this. Or if you prefer the manual type (and less expensive), use a keyhole saw.
Install the support and housing unit. Follow the manufacturer’s instructions here. They actually know what they are talking about. Then put the housing in and slide to one side to push through the new wires and attach them to the wires from the ceiling and tighten it all up. Remember the ground and neutral wires! Normally, they are green and white, respectively. If dealing with a light, as well, that may be on the same switch or might be separate.
Slide the housing now to connect it to the duct. Use duct tape or a clamp. Now, attach the housing to the joists with screws after noting the positioning of the fan’s housing bottom is even with the ceiling. If you are in the attic, or the story above, it may be beneficial to have someone downstairs to let you know when this is accomplished. Running up and down becomes tedious.
Screw in the wiring cover plate. Normally, these will be included. Connect the fan motor and again, be wise and follow the manufacturer on this. Secure the motor with the screws that have been provided.
Step 4
Test your work and turn on the power, run quickly and excitedly to the bathroom and engage your most recent project!
If it does not work, you must turn off the power again and check all the wiring.
If it does work, Yay!, you are done!


 Auto insurance quote
 Get a Business Loan