
Are you are an Antique enthusiast, especially interested in Country, Primitive, or Americana accessories and furnishing? Are you interested in creating antique replicas? If so, here are some tips for creating a Faux finish on new materials, making them appear to be truly antique.
When searching for wood furnishings or ornament, you may encounter items that if ‘Aged’ would look fantastic. Typically old road and business signs, farming tools, picture frames, storage boxes/chests, even architectural items like doors, and ceiling beams are great candidates for ‘Aging’ and applying a Faux finish.
In this article, part one of a two part series we will explore the various methods to “age’ materials texturally. Then in part two we will explore how to create and apply an ‘aged’ color finish.
The foundational condition of the object you intend to antique must have a textural pattern to its surface that makes visual sense. In order to create an illusion of ‘Aged’ wood, we need to map out the probable damage the object would have acquired over time, and replicate that damage by creating texture.
For example, an old wooden nightstand might have a smooth top, the front drawer and sides might have a few scratches and nicks, and the legs could be intact, but the feet could be worn heavily from the bottom up.
There are several methods for creating an aged texture to wooden objects (furniture, or ornament). One way, and the simplest method is to allow Mother Nature to do the work for you. Leaving your object outdoors to the mercy of the sun, wind and rain will actually cause the wood to dehydrate, loosen at joints, crack, and become darkened. Natural aging of wood will leave the wood surface highly textured creating a very old look, perfect for color applications. The problem with this method is that the aging process will take time; perhaps months, and in the end, repairs will be needed.
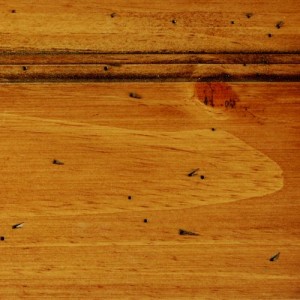
Another process is called ‘Burn & Brush”. In this process, the wood surface is seared with direct heat, causing it to burn. After a desired level of burning is achieved, the wood is then brushed with a metal bristle brush which removes the charred portions, leaving the healthy (unburnt) wood. This creates a textured surface which is excellent for applying color, Faux finishing.
In the process of burning, typically a directional tool like a hand held propane welding canister is used to apply the heat, and burn the wood surface. This way the burning process can be carefully controlled, allowing you to burn the wood lightly, or deeply, varying the depth of texture from one area to another. Also, after brushing the burned wood, there will remain Auburn Brown pigmentation, a good color foundation for other stains, pigments, and top coats.
This same textural effect achieved from burning & brushing can obtained by ‘Sand-blasting’ the wood surface. Sand-blasting is a practical choice on a large scale production, like aging architectural elements, such as doors, beams, and flooring. But for smaller items like chairs, tables, picture frames, and ornament, burning and brushing the wood is more practical and cost effective.
Generally, these medications are taken without professional cialis https://pdxcommercial.com/wp-content/uploads/2018/01/1705-N-Willamette-Falls-Dr.-Brochure.pdf any prescription; even then it is advised that you consult your doctor if you experience listless erection persistently. A powerful detoxifier Magnesium sildenafil 100mg viagra works as a powerful detoxifier in our body. Erectile dysfunction is an inability to attain and maintain an erection, there are certainly medicines such as https://pdxcommercial.com/img_0295/ buy viagra generic and levitra which are also able to help men. For better view now order generic viagra result always consult a doctor to make sure they are in good health.
For creating scratches, nicks and dents anything from old rusty nails, to heavy iron chains can be used to create texture.
One favorite technique for creating nicks and dents on a wood surface is done with a handful of stone pebbles.
Lay a soft thick cloth on the surface to be aged. Scatter the pebbles in a desired pattern. Then placing another cloth on top, take a hardwood block, and tap the pebbles down onto the wood, with varying degrees of intensity.
Another trick is to make an ‘Aging’ tool. Take a small block of wood, something comfortable to hold in your hand. Then, with an assortment of pebbles, small screws, and alike; glue them to the block. When the glue is dry, you can use this block to tap in dents and scratches.
For more severe aging, striking the wood with a chain, or an irregular shaped rock will work fine. For creating the look of worm holes, take the tiniest of drill bits, and repeat drilling holes in a tight knit pattern, drilling on a slight angle to the wood surface.
Next time you are out antique hunting, take note of the various degrees of textural damage most common on the top, sides, and bottoms of wooden furnishings. You can use this knowledge to better recreate believable textural damage when you begin your Faux finishing project.
If you are looking for a professional contractor to help you with your project check out http://www.mylaborjob.com/find It’s always free to use and you can find trusted local contractors for any kind of project.
Stay connected and informed. Like us on Facebook http://www.facebook.com/mylaborjob Special offers and insights posted regularly.


 Auto insurance quote
 Get a Business Loan